Showing posts with label Bread. Show all posts

Sunday, October 23, 2011

Pizza Crust/Breadstick Recipe

One of my menus this month features breadsticks so I searched around until I found some pizza dough and breadstick recipes. I ended up combing several recipes in order to get what I wanted. The ingredient list and most of the directions come from Passionate Homemaking. Here's the recipe, including my changes.

2 T. yeast
3 1/2 cups water, divided (110 degrees)
3 T. acid medium (yogurt, kefir, lemon juice, whey, apple cider vinegar)
1 t. honey
1/4 cup honey
1 T. salt
8-10 cups whole wheat flour (or combination with kamut)

Soaking:
Combine 8 cups flour, 3 cups water, substituting some of the water with 3 T. acid medium, and 1/4 cup honey. Allow to soak for 12-24 hours.

Kneading:
After soaking, activate yeast in a small container with the remaining 1/2 cup warm water and 1 t. honey. Allow to foam up for about 5 minutes. Add the proofed yeast to the soaked flour, along with the salt. Mix well and let rest (autolyse) for 15 minutes. Knead for 5-10 minutes, adding additional flour as needed. Transfer to a greased bowl, turning to coat. Let rise until double.

Dough ready to rise.
Baking:
For Pizza:  Preheat oven to 500 degrees. Divide into four sections. Roll each into desired shape. (Roll on parchment paper, turning 1/8 of a turn once every roll, only rolling away from your body.) Pre-bake 5 minutes. Remove from oven and top with desired toppings. Bake for an additional 10-165 minutes, watching to make sure edges and cheese don't burn.

For Breadsticks:  Preheat oven to 350 degrees. Dough will be slightly sticky so you'll need to flour your hands as you roll. Divide into portions slightly larger than a ping-pong ball (I ended up with 7, but some of mine were a bit long). Shape each onto a ball; roll each into a 9-inch rope. Place on greased baking sheets. Cover and let rise in a warm place for 40 minutes or until doubled. Bake 18-22 minutes or until golden brown. Remove to wire racks. Brush with butter and sprinkle with garlic salt.

 Shaped and rising
Baked, buttered and salted! Yum!
Freezing:
Mix dough completely as instructed and then divide into four portions. Freeze the dough in individual Ziploc bags. You do not need to pre-bake. When you are ready to use, thaw in the refrigerator several hours, bring to room temperature and then roll out and assemble as desired.

Wednesday, October 19, 2011

No-Knead Bread

I had two recipes for no-knead bread that I wanted to try, but decided to go with the one that didn't require sourdough. This particular recipe calls for regular bread flour, but I used freshly ground hard white. I think the amount of flour needs to be increased by at least 1/2 cup because the dough after 20 hours was very liquidy and would not hold its shape. I ended up adding the additional flour during the shaping stage so I could get it to hold its shape and stop sticking to my counter and the towel. The original recipe is as follows, with my changes and suggestions marked in blue.

I have to say this bread was amazing. Even Horse Girl liked it and she has been very critical of my baking lately. I had two pieces fresh out of the oven smothered in butter.

No-Knead Bread


3 cups bread flour (increase to at least 3 1/2 cups if using freshly ground flour)
1/4 teaspoon instant yeast
1/2 3/4 tablespoon kosher salt (too salty with 3/4 T. so maybe it was only supposed to be 3/4 t.?)
1 1/2 cups warm water
Parchment paper
Covered pot (5-qt or larger that can withstand a 450 degree oven)

1. Mix dough: The night before, combine all ingredients in a big bowl with a wooden spoon until dough just comes together. It will be a shaggy, doughy mess. Cover with plastic wrap and let sit 12-20 hours on countertop.

2. Shape and preheat: The dough will now be wet, sticky and bubbly. With a wet spatula, dump the dough on a floured surface. Fold ends of dough over a few times with the spatula and nudge it into a ball shape. You can use your hands if you like, just keep your hands wet so the dough doesn't stick. Lay a piece of parchment paper on cotton towel (not terry cloth) and generously dust with flour. Generously dust a cotton towel (not terrycloth) with flour. Set dough seam side down on top of parchment paper towel. Fold towel over the dough. Let it nap for 2 hours. When you've got about half an hour left, slip your pot into the oven and preheat to 450 degrees.

3. Bake: Your dough should have doubled in size. Remove pot from oven. Holding towel, turn over and dump wobbly dough into pot, using your hands to get the dough off the towel. Shake to even out. Remove towel and transfer dough to pot, leaving parchment paper around outside. Cover. Bake 30 minutes. Uncover and bake an additional 15-20 minutes or until crust is beautifully golden and middle registers 210 degrees. Remove and let cool on wire rack. Can re-crisp crust later in 350 degree oven for 10 minutes.

 Sorry about the half eaten loaf. I forgot to take pictures until after we sampled it.
I close-up of the inside. Look at the wonderful crumb!

Monday, October 17, 2011

Sourdough Banana Bread

I just finished my sourdough starter and am praying that it's okay. I was, and am still, a little concerned about it not being right. I got varying information in all of my research, with some sites saying to cover with plastic wrap and others saying to cover with cheesecloth. I had some saying to feed once per day and others feeding every 12 hours. Hmm, what's a girl to do?

I decided to make a batch of Sourdough Banana Bread since I have the sourdough and bananas needing to be used. I took the recipe from Wild Yeast Blog and tweaked it slightly. I don't like using a lot of oil in my baking so I substituted 1/2 cup of applesauce for 1/2 cup of the olive oil, used 250 g. of Sucanat and 50 g. of honey, left out the lemon zest and used all banana. I also added about 1/2 cup of chocolate chips to one loaf. This recipe made two 8x5-inch pans and one smaller loaf.


In addition to this banana bread I plan to make Mexican Chocolate Cupcakes, No-Knead Sourdough Bread, Sourdough Bread, and Pancakes.

In order to make all of these wonderful things, I've placed several items on my Amazon wishlist, including a digital scale, The Bread Bible book, Silpat, and Kefir grains. I'm so excited to begin this amazing journey! I can't wait to get them ordered.

October 18, 2011 Update: The banana bread is wonderful. It's nice and moist and full of flavor. The pancakes this morning turned out fine, though a bit tough. I think they would be wonderful as a cross between bread and tortillas. I put fresh peanut butter (from Whole Foods) and raspberry jam on mine to make a sandwich. 


I decided not to make the cupcakes as I didn't keep enough starter out. I put roughly 2 cups in the refrigerator and left one cup out. I added 1 cup of flour and 2/3 cup of water to the one I left out and it grew slightly overnight. I used that this morning for the pancakes, No-Knead bread and regular sourdough bread. The sourdough bread is currently in its final rise and waiting to go into the oven. The No-Knead is in its overnight resting phase and will be baked around mid-day tomorrow.


I couldn't wait any longer and ordered my Kefir grains and the digital scale last night.

Friday, October 14, 2011

Sourdough Starter Day 5

I think my starter is beginning to come together. It's doing exactly what the tutorial said it would and the odor is getting fainter and sweeter. I did remember to take pics this morning.

 View from top with weird, but really cool bubbles.

Wednesday, October 12, 2011

Sourdough Starter Day 3

I forgot to take pictures this morning before pouring off the dark liquid and mixing in the new flour and water, but boy, did it stink. I think it's supposed to be stinky if I remember correctly from the directions. Horse Girl said it smelled like a dirty diaper. I'm not sure what I would compare the smell to, but let's just say it wasn't pleasant.

Tuesday, October 11, 2011

Sourdough Starter Day 2

I've decided to try my hand at making a sourdough starter. I found directions on the Heavenly Homemaker site at this link. You need to scroll all the way to the bottom to find day 1 and then wind your way back to the top to finish with day 8. This link also has recipes for different ways to use your sourdough once it's finished.

 Morning of day 2 with a layer of dark liquid, hooch, on top.
 View from the top.
After 1 cup of flour and 1 cup of cold water have been added and thoroughly stirred. It is now sitting on top of my refrigerator.

Cornbread using soaked grains

I recently came across information on soaking grains to get the most out of them nutritionally. I decided to try a recipe called Blender Batter Cornbread from Sue Gregg. It turned out phenomenal. I am saving it for cornbread stuffing tomorrow evening, but this may become a staple item for us. I just had some for a snack and I can see making a whole meal out of it. I should have taken a picture this morning after it had been sitting for 24 hours.

Batter ready to go into the oven. 

Out of the oven and cooled a bit. It sank down in the middle, but it still tastes awesome.
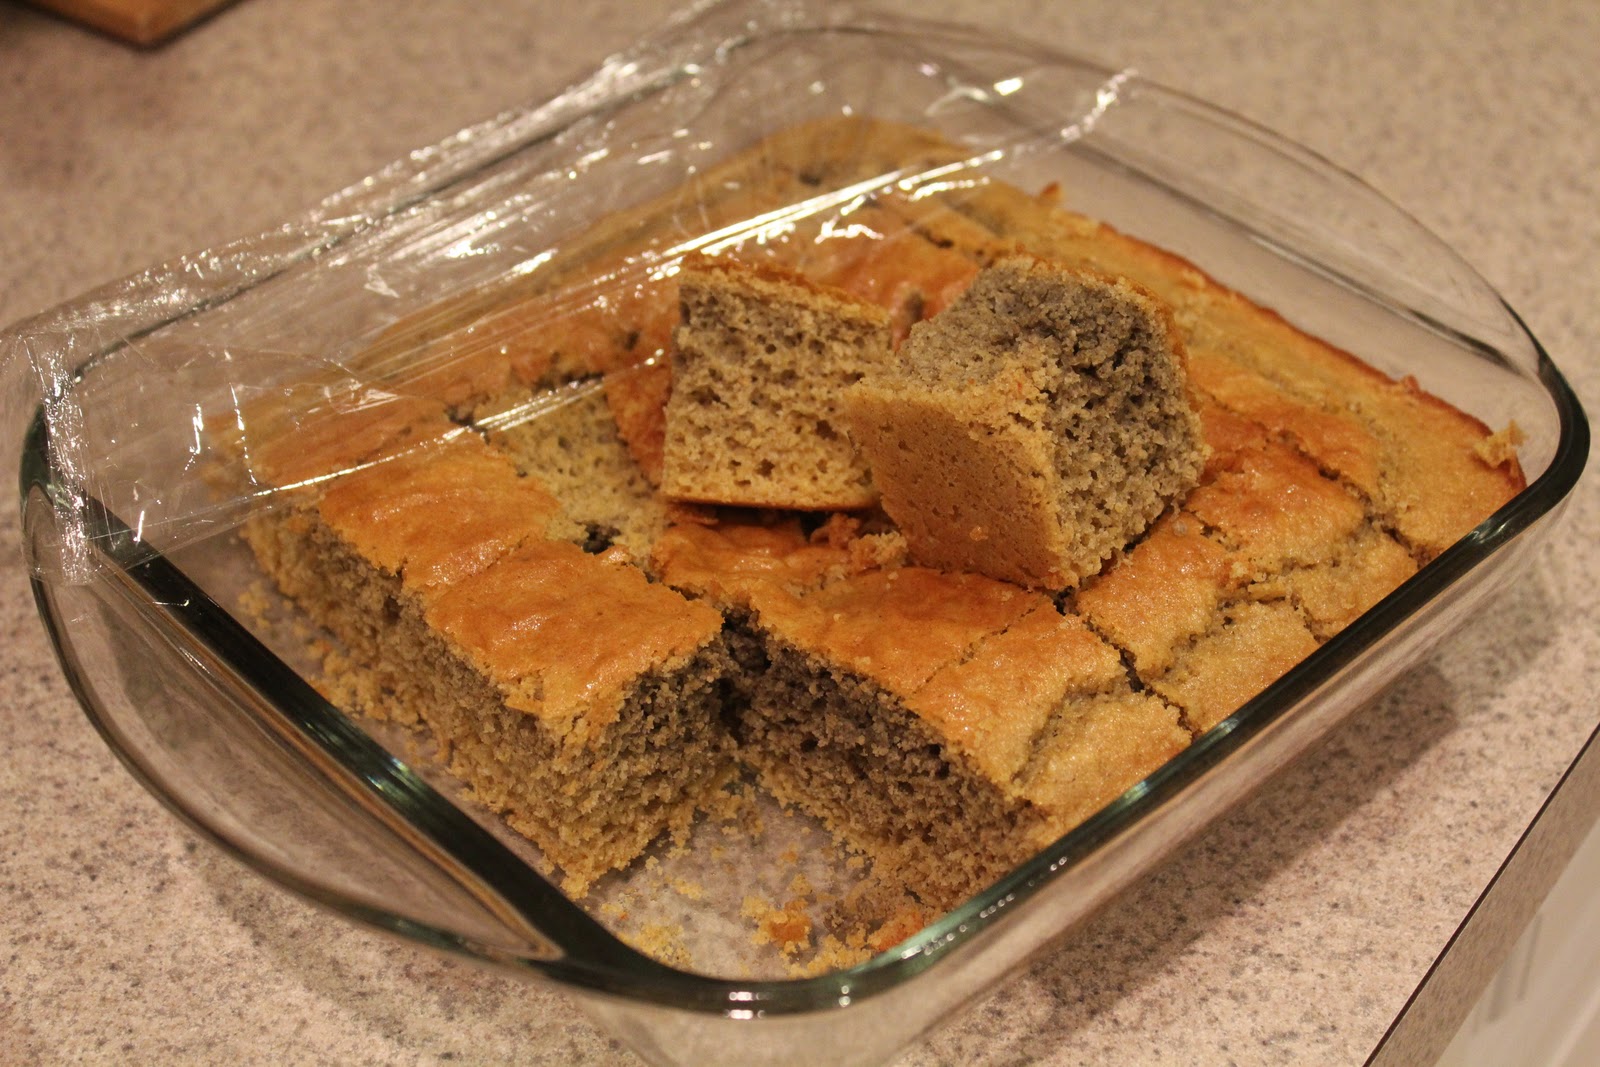
Unfortunately I spoke too soon and this is what the cornbread looked like several hours later. It's a weird grayish color inside. I'm not sure if it's still safe to eat. Any ideas?